Step by step guide on how to set up Google Search Console (formally webmaster tools).
Step #1 – Visit the Google Search Console Page
Head over to the official Google Search console page using the following link: https://search.google.com/search-console/welcome.
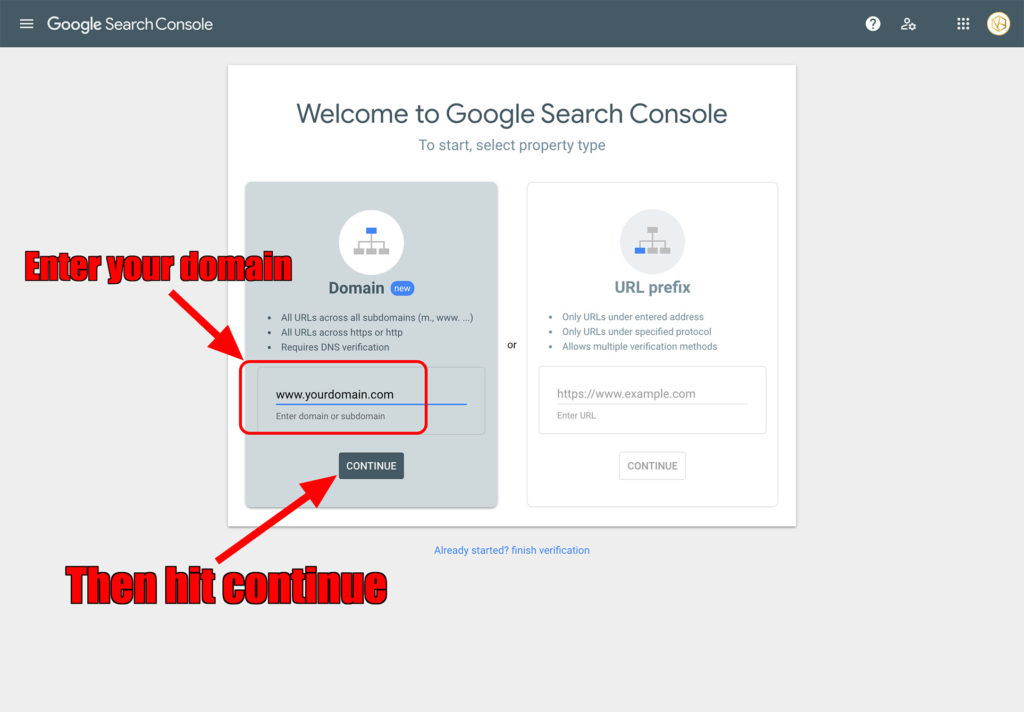
Step #2 – Enter Domain Information
Next, you’ll be given the option to enter “domain or subdomain” or “URL”. The main difference between the two is that by entering a “domain or subdomain” you will be able to track all URLs associated with that domain/subdomain which is the option you want to choose if you want to track the performance of the whole website. The other option is to enter a “URL” which will enable you to track the performance of that single URL. For the purpose of this example, we will enter a domain. So go ahead and enter your domain name in the left side field and hit ‘continue’.
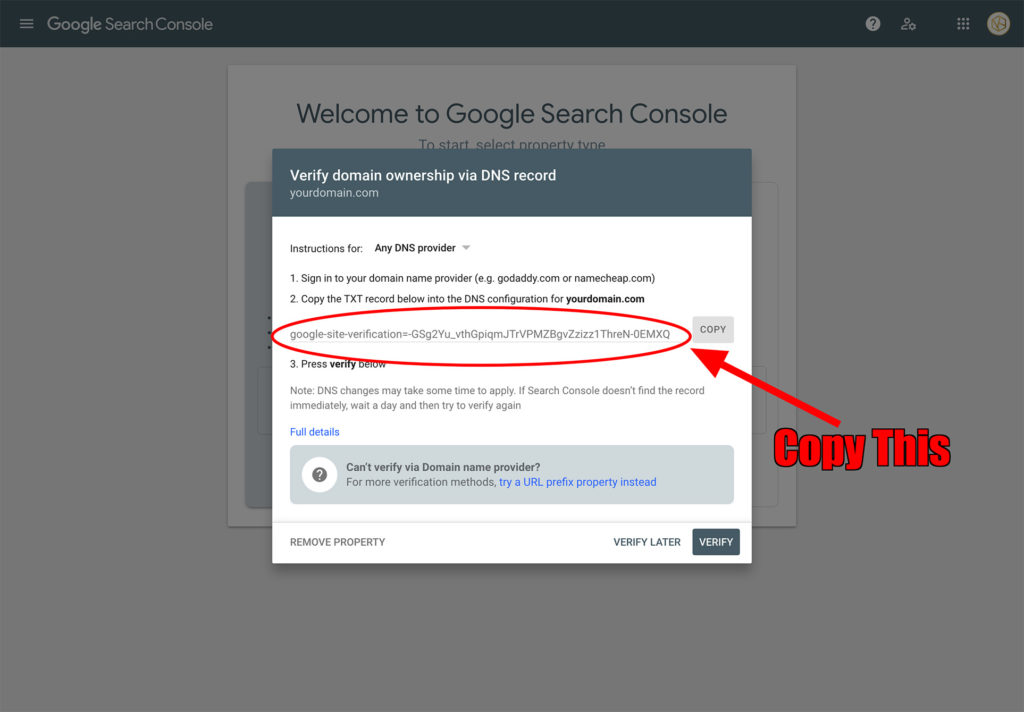
Step #3 – Verify domain ownership via DNS record
Next, you’ll have to verify your ownership of the domain. In order to do this, you’ll have to copy the code provided to you by the Google Search Console and add it as a TXT record to your domain’s DNS settings. So firstly copy the code provided by Google.
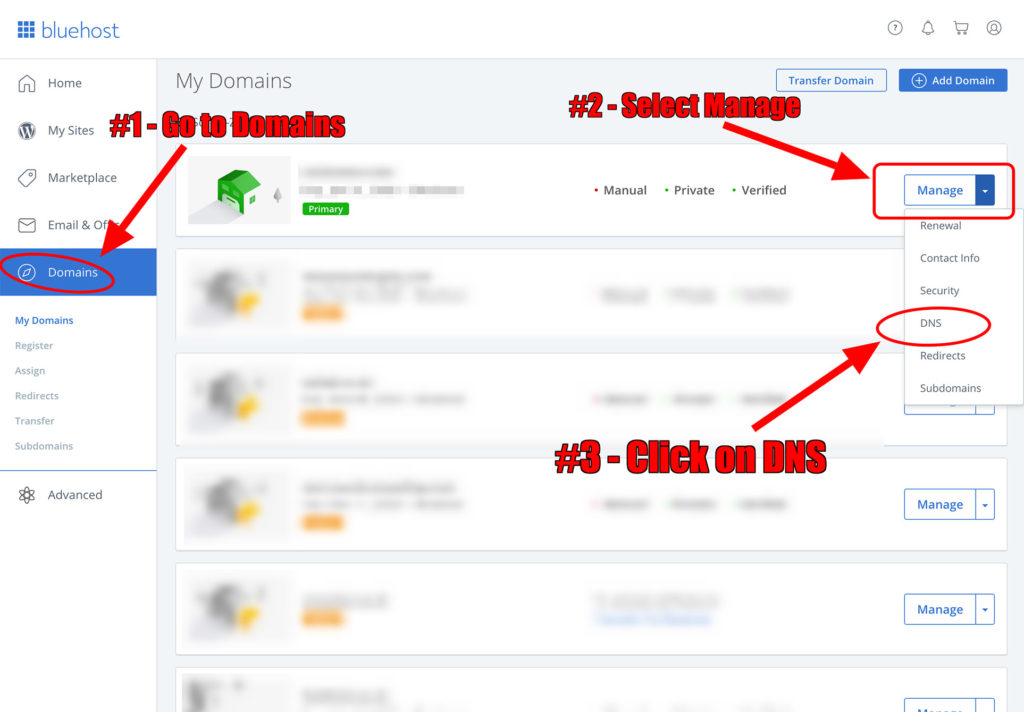
Step #4 – Add TXT Record to your domain DNS settings
Next, open up a new tab and log onto your control panel for wherever your domain is hosted. We’re using Blue Host for the purpose of this example but the process should be similar with different hosts.
Once logged in, go ahead and select ‘Domains’ for the left-hand side. Then next to the domain you want to add to the Google Search Console select ‘Manage’, then from the drop-down menu select ‘DNS’.
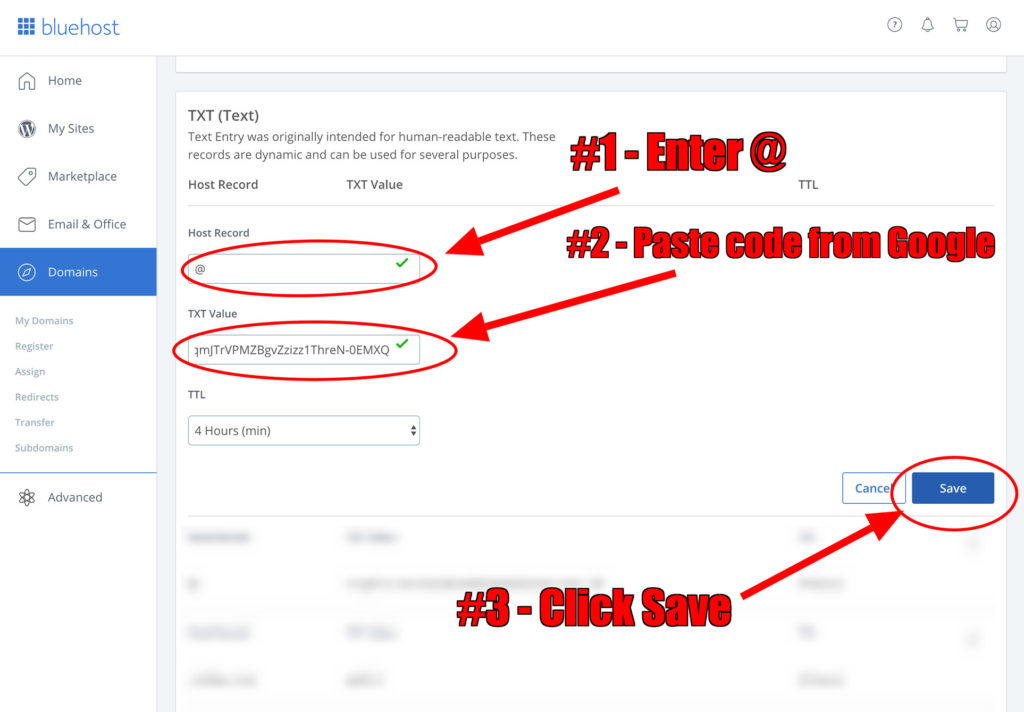
Next, scroll down to the section entitled ‘TXT (Text)’ and select ‘Add record’
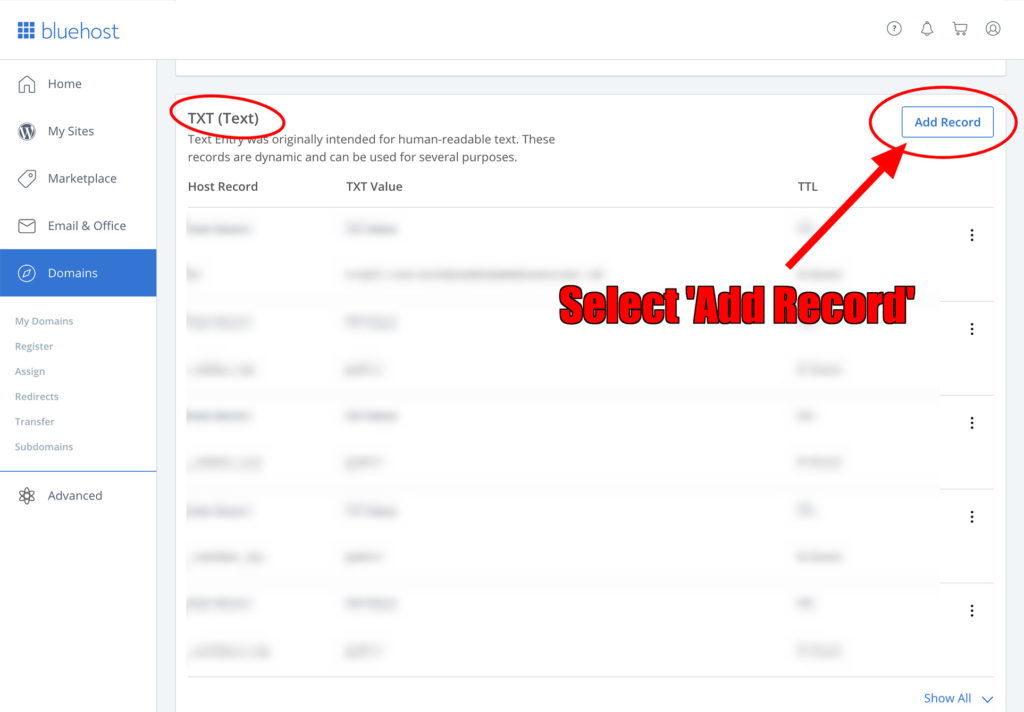
Next, in the ‘Host Record’ field enter ‘@’. And in the ‘TXT Value’ field past the verification code provided to us from the Google Search Console Set-up. Then click ‘Save’.
Step #5 – Verify ownership of your domain
Your DNS changes have now been added but might take up to a few hours to become active on your host’s server. Go back to the Google search console tab and click on ‘Verify’.

You should now receive a notification stating that the domain has been verified successfully. You will now be able to access Google’s Search Console for your domain.
If after clicking ‘Verify’ you receive an error message stating “Ownership verification failed”, it could mean that the DNS changes have not taken effect yet, and you’ll have taken keep trying. Check every hour or so, and if the problem still persists then contact your domain hosting provider for assistance.
We hope this guide on How to set up Google Search Console (formerly webmaster tools) has been useful for you. Feel free to leave your comments below and share this with someone who could benefit from it!

